
Plants + the systems to grow them
Does your plant climb — or creep?
Most plant supports are built for climbers. But half the most spectacular tropical plants in the hobby don't climb at all — they creep, trail and spread. The wrong support holds them back. The right one lets them do what they were built to do.
Two different growth habits. Two different supports.
In the wild, tropical plants have evolved two distinct strategies for moving through the forest. Understanding which one your plant uses is the single most useful thing you can know about growing it well.
Climbers
These plants evolved to scale tree trunks, sending out aerial roots that grip the bark and draw moisture from it. In your home, a sphagnum-filled Moss Pole mimics that bark surface — the roots attach, the plant anchors itself, and the leaves respond by growing dramatically larger and more fenestrated than they ever would trailing in a pot.
Climbers in our range
Aerial roots attach to sphagnum — leaves double in size
Slow grower; a pole keeps each leaf pointing upward
Heavy stems need firm vertical support
Fast climber — give it a pole early
Velvety leaves grow dramatically larger on a pole
Climbing habit; pole keeps variegation visible
Creepers
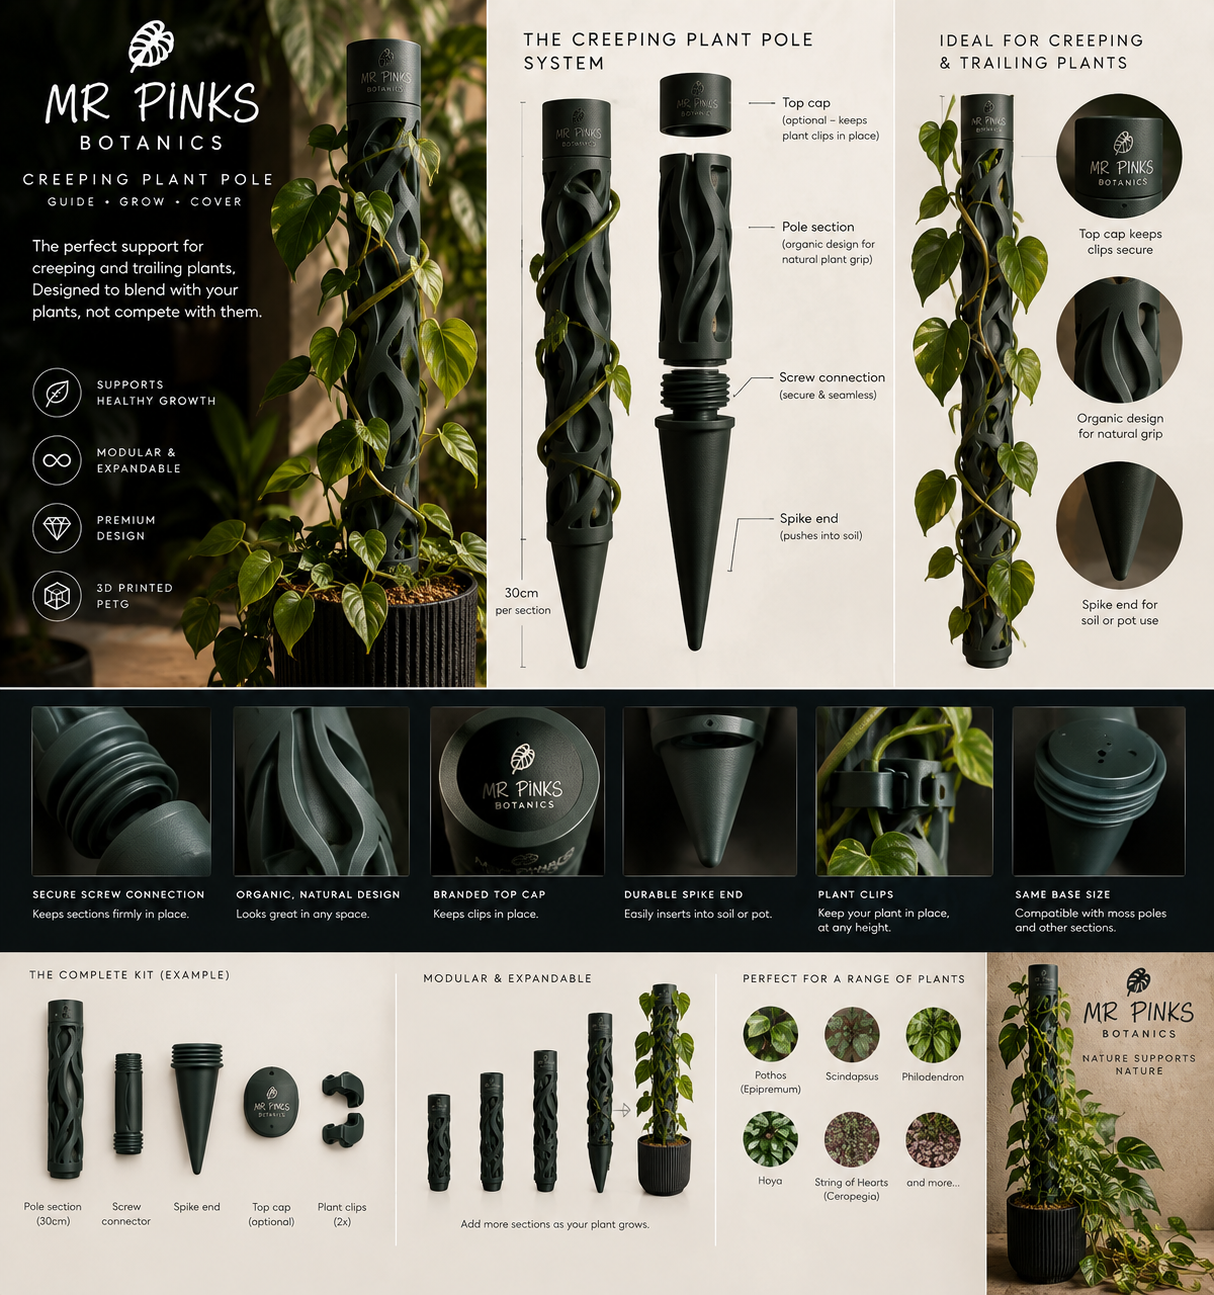
These plants evolved to move horizontally — across the forest floor, along fallen logs, over rocks. Philodendron gloriosum is the classic example: it's a terrestrial creeper that spreads sideways, not upward. Give it a vertical moss pole and it will fight you. Give it a Creeper Pole — a horizontal or low-angle surface it can spread along — and it will produce leaves that dwarf anything it manages in a standard pot.
Creepers in our range
Terrestrial creeper — fights a vertical pole
Can be trained horizontally on a Creeper Pole
Shingling species — needs a flat surface to attach
Creeping fig; spreads across surfaces naturally
Vining habit suits a low-angle Creeper Pole
Trailing; benefits from a horizontal surface
The system
A pole that grows with your plant
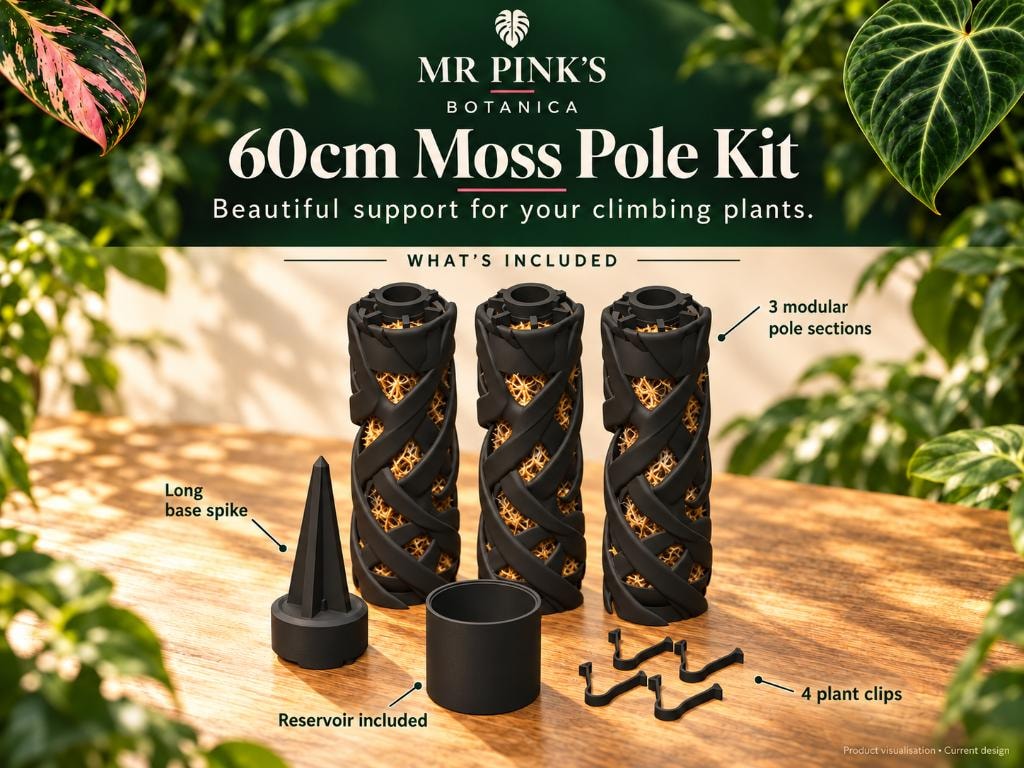
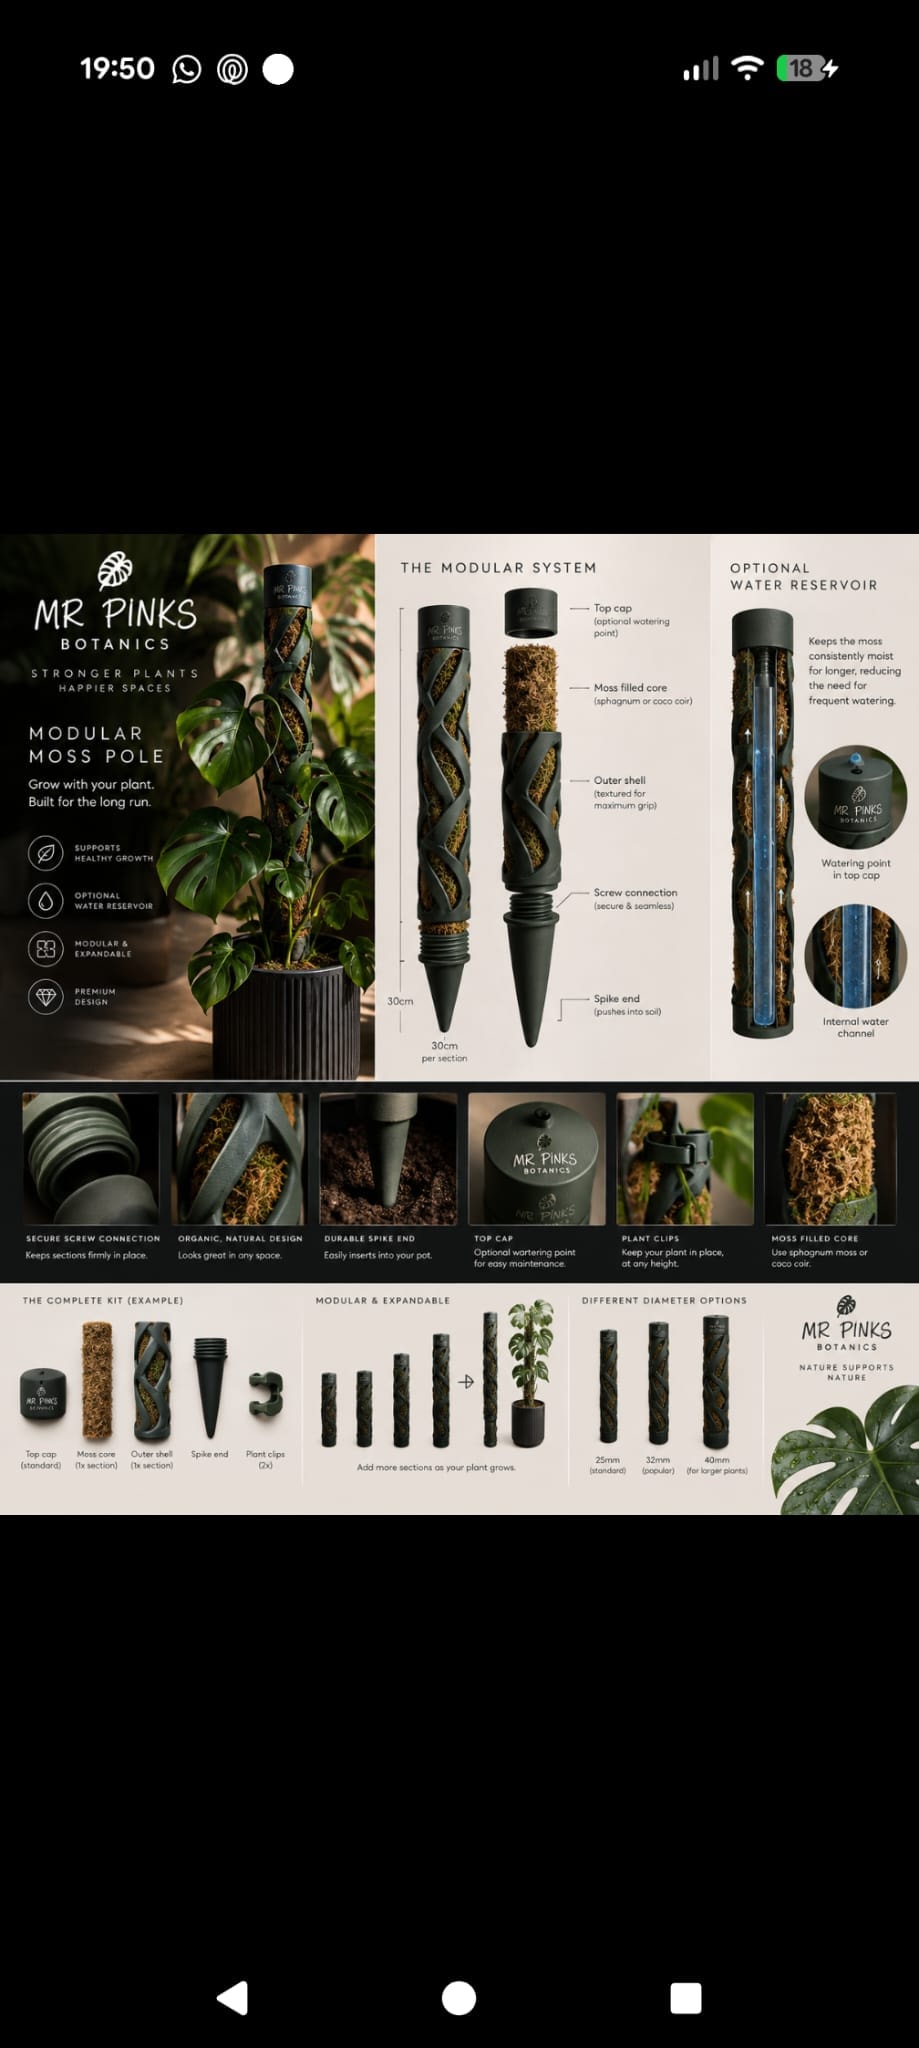
Every Mr Pink's Moss Pole is built from 3D-printed modular sections that connect with a bayonet fitting. Start with a 40 cm kit. When your plant reaches the top — and it will — add a 20 cm extension section. No repotting. No replacing the whole pole. No starting over.
The sphagnum moss core stays moist between waterings. Aerial roots find it, attach to it and draw moisture from it — exactly as they would from tree bark in the wild. The plant responds by producing larger leaves, stronger fenestrations and faster growth. It's not magic. It's just the right environment.
3D-printed
Precision-fit sections
Modular
Extend at any time
Sphagnum
Moist core for aerial roots
Moss Pole Kits
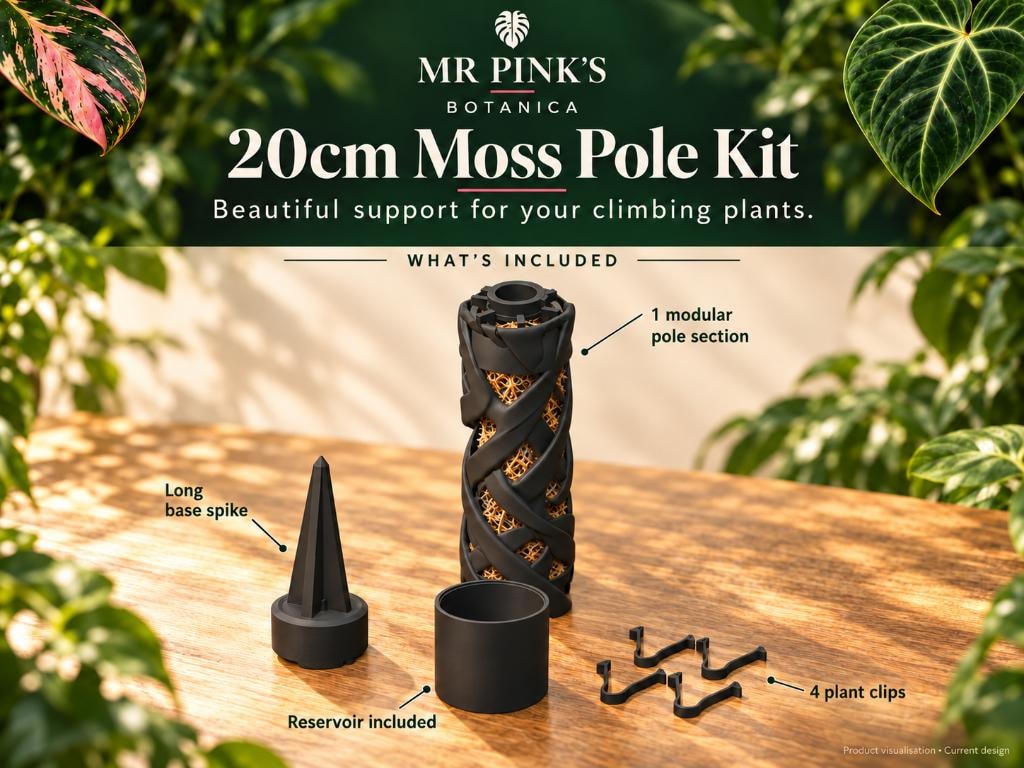
Modular, expandable, sphagnum-filled. Start small, extend as your plant grows.
Creeper Poles
Built for plants that spread horizontally. Gloriosum, Marcgravia, Ficus pumila and more.
Assembly and use
Each kit includes everything you need to get started. Here's how to set it up and keep it working.
Soak the sphagnum moss
Before assembly, soak the included sphagnum moss in water for a few minutes until it is thoroughly damp but not dripping. Squeeze out any excess. The moss should feel moist and springy — this is the medium your plant's aerial roots will attach to.
Pack the sections
Fill each section firmly with the damp sphagnum, pressing it in so there are no air pockets. A well-packed section holds moisture longer and gives aerial roots a consistent surface to grip. Plants and pots are not included — the pole is designed to sit in your existing pot alongside the plant.
Connect the sections
Each section connects to the next using the bayonet fitting — align the tabs, push down and twist to lock. The connection is firm and stable. Start with the base section and work upward. The spike at the base pushes into the potting medium to anchor the pole.
Position and train
Push the assembled pole into the pot alongside your plant's main stem. Use soft plant ties or clips to guide the stem against the pole — don't force it. As the plant grows, aerial roots will find the moss and attach on their own. Avoid tying so tightly that you damage the stem.
Keep the moss moist
Water the moss directly as well as the potting medium. In dry indoor conditions, misting the pole between waterings helps keep the surface damp enough for aerial roots to stay attached. The moss does not need to be saturated — consistently moist is the goal.
Extending the pole
When your plant reaches the top of the pole, add a 20 cm Extension Section. Pack it with fresh damp sphagnum, then connect it to the top of the existing pole using the bayonet fitting. There is no need to repot or disturb the plant.
Not sure which pole your plant needs?
Browse the full range in the shop — each product lists the plants it suits. Or get in touch and we'll point you in the right direction.